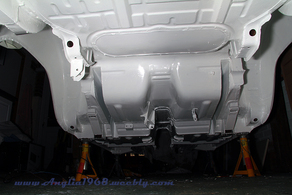
Three weekends ago I finished off underside preparation by cleaning down the surface with a petrol soaked rag to remove the last of the underseal, wash with POR15 Aquaclean, wash with water, applied POR15 Metal Prep and carried out a final clean water wash down. This was then wiped down and left for a week to fully dry out. Then began the mammoth job of painting the rest of the underside, three days later and the whole of the underside had had two coats of KBS Rustseal, all seams sealed and a final coat of KBS Rustseal. So the whole process was -
- Wirebrush of all lose paint and undeseal
- Wash down with petrol soaked rag
- Clean with POR15 Aquaclean
- Wash down with clean water
- Apply POR15 Metal Prep
- Wash down with clean water
- Wipe down with dry cloth
- Leave for a week in garage to dry
- Apply two coats of KBS Rustseal
- Seal Seams with Tigerseal
- Apply a final coat of KBS Rustseal

I disassembled the rear axle, removed the diff and drive shafts, cleaned these, the 5 link bars, front uprights, brake brackets and front hubs. Painted all of these with Hammerite so they are all ready to re-fit once the paint has been given time to go off fully. I also trial fitted the rear disc brackets. Unfortunately the Caprisport brackets that bolt onto the outer face of the axle casing do not fit i.e. put the disc in the wrong place relative to the caliper (about 10-12mm out). After a measure up I concluded that brackets that fitted on the rear of the axle case flange were the once to get, so have ordered a set from Mk2mania.
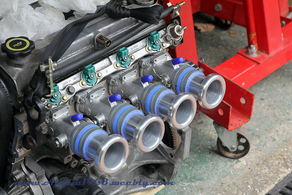
I also ordered and received the adaptor plate for the throttle bodies from Lasermaster, looked a pretty good fit straight off but with a few slight tweaks and the bolt/stud holed drilled it looks like it will do just the job. Only job left to do it to get a larger countersink to further recess the bolts for the adaptor to head connection.
I also ordered and received the adaptor plate for the throttle bodies from Lasermaster, looked a pretty good fit straight off but with a few slight tweaks and the bolt/stud holed drilled it looks like it will do just the job. Only job left to do it to get a larger countersink to further recess the bolts for the adaptor to head connection.

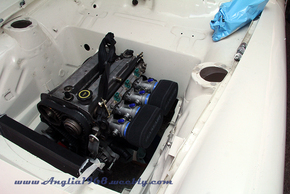
The final job on chassis prep, after finishing the painting last week was to bolt together the engine, gearbox and bell housing and do a trial fit so that I could get measurements for the sump, engine mounts and gearbox mount. It all looks pretty good and looks like I will have some good space around the engine for the throttle bodies and the exhaust. Following these measurements I have developed CAD models of the sump/block mating face and mounting plates for the engine and have sent the sump ideas off for a quote.
So I am now in a position where I can start to bolt parts back onto the car rather than take them off. Rear axle will be first, then the front uprights which I suspect will take a while to get into a position where the camber/toe etc is correct and then I can start of ordering the engine mounts and possibly the exhaust and whilst these are making their way here I can look at door cards and assembling the doors/seals etc. and finalising the designs for the petrol tank , radiator header tank, catch tank and washer bottle and working out the coolant system .
So I am now in a position where I can start to bolt parts back onto the car rather than take them off. Rear axle will be first, then the front uprights which I suspect will take a while to get into a position where the camber/toe etc is correct and then I can start of ordering the engine mounts and possibly the exhaust and whilst these are making their way here I can look at door cards and assembling the doors/seals etc. and finalising the designs for the petrol tank , radiator header tank, catch tank and washer bottle and working out the coolant system .
