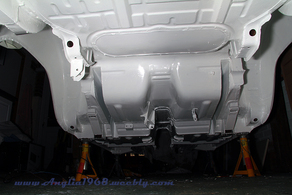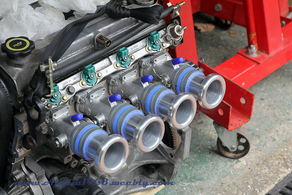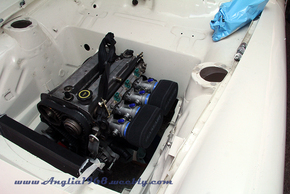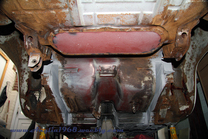
1968 Ford Anglia Project
  • Homepage
  • Blog
  • Events
  • Spec
  • Images
    • General
    • Engine / Gearbox
    • Brakes
    • Running Gear
    • Bodywork
    • Interior
    • Electrical
    • Wheels
    • Drawings
  • Videos
  • Weights

Quite a bit to catch up on !

3/9/2016

 
Picture
Once all of the various painted part had had a couple of weeks to harden off I then started to put them back on the car. The end result does not look too bad, just need to paint over the stainless bolt heads on the bumpers. Fitting the windows was a bit of a chore but eventually I found a way of doing it without damaging the paintwork so again they are in and functioning, last job there is to fit the final boot badge and hang the doors so the side groove matches up, they are sitting a bit low at the moment, this will also allow me to fit the stainless door sill trims.

Picture
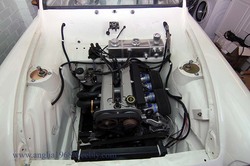
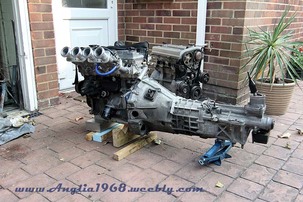
Now this is where the fun starts. The engine was running OK but I noticed that there was a leak from the front crank seal, easy job I thought, bit of 5mm ally bar to lock the cams and a screwdriver to lock the flywheel, same as my old Zetec SE, off the the cambelt comes, then the front pulley, slot in the new seal and reassemble, all should stay in alignment because the pulleys are keyed. WRONG !!!! The Zetec SE has no key ways so the pulleys are all held on by friction and the tightness of the bolts. So, find TDC, again lock off the cams, undo the crank pulley (no key), put in the new oil seal, crank pulley back on, tighten it up as per the online manual I had read. Job's a good 'un. Started her up and it caught and then would not start again - you guessed it - crank pulley had slipped, what the manual did not say was to replace the bolt as it is a stretch bolt and needed tightening to the torque and then 1/4 turn after. So, process over again, this time i used the crank lock pin which I had inadvertently hidden behind the engine mount so that had to come off, new bolt, tighten up. Engine now runs but cylinder 1 and 2 do not sound right, so suspected bent valve. Rather than take the head off to inspect is was cheaper to get another engine that was running right so that's what I did. The new engine was then stripped, cleaned (looked a better engine in fact, no signs of an oil leak and the inlet ports were much cleaner) and readied for installation

Picture
So, whilst I was installing the engine and the original and the Type 9 gearbox had to come out it was a good opportunity to fit the RX8 gearbox I had also picket up. The RX8 box is a 6 speed, helical gear, all alloy gearbox with integral bell housing and a short shift. It is rated to around 250hp/ftlbs, will rev to 9k and the basic gearbox (Aisin AZ6) is used in the Mazda RX8, Lexus IS200, Mazda MX5 mk3, Toyota GT86, Subaru BRZ and Nissan 200SX S15. All off these version have different bell housing hole patterns and input shafts but the RX8 input shaft is a 1" 23 spline version which is the same as the ford one so the Type 9 clutch plate can be used. The gear ratios are a cross between a standard Type 9 (1st) and a Quaife Clubman Type 9 close ratio box (2nd - 6th). Ratios are 1st 3.760, 2nd 2.269, 3rd 1.645, 4th 1.187, 5th 1.000, 6th 0.843 . the beusty of this box is that you get all of this for less than £100 for the box, £115 for the adapter, a few pounds for new bolts (and the engine cost £90 !)  which is way less than even the type 9 bell housing I originally bought and an order of magnitude less than a long first HD type 9.

To fit the gearbox to the engine a guy on ebay/turbosports makes adapter plates (freddy686868) which I ordered and it came pretty quickly. The gearbox needed a couple of modifications, the area where the starter motor mounts needed grinding out to fir and when I trial fitted the box in the car the left rear mount needed removing as it fowled the type 9 gearbox mounts that are on the car (not a standard fixture). teh RX8 box is a hydraulic clutch system (external not concentric slave) which I am hoping to adapt to use my cable clutch, initial measurements and mock up looks promising. Just need to make up a rear mount which I think I can use the Cortina one form the type 9 .

Whilst I was at it I also took the opportunity to tidy up the rear water manifold, getting rid of my home made affair and fitting in line water temp sender adapters, I also decided to keep the the cam belt cover which meant modifying the front engine mount to tidy it it. I also re-routed some of the coolant pipes. So, currently the engine and gearbox are in, they need fully bolting together, a rear mount needs making (temporary on on there at the moment) and then I can get the prop shaft ordered.
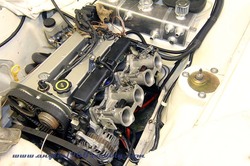
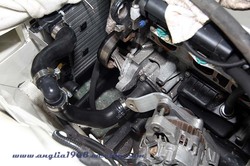
getting there ???

3/4/2016

 
Picture
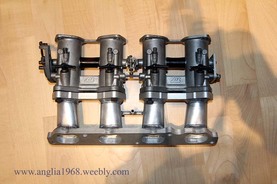
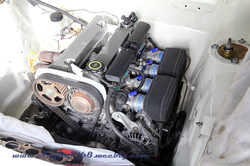
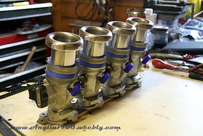
Slow but sure progress over the past couple of months. As previously identified, I did have to remove the throttle bodies to install all of the coolant pipes on the passenger side of the engine. It is a bit of a tight squeeze routing everything down one side including the throttle bodies, the majority of the engine loom, the alternator and the main coolant pipes (mostly 32-36mm diameter). So I did change the throttle bodies to the TJ 42mm DCOE ones which helped a bit and these should be a more reliable and an easier system to tune, not fired the engine up with these on but will do in the near future.

Picture
So the radiator, header tank, engine and heater are all now plumbed in and ready for filling with water/anti-freeeze. As can be seen by the picture to the right there is quite a convoluted set of hoses from the rad top to the engine side housing that had to go around the alternator, I did this in the end using the stock Puma hose and a 90 degree connector but it did tax the grey matter getting there.

Next job on the list was to prepare all of the trim and various brackets for painting, the reason for painting is that I think it will look slightly more modern and also the chrome was badly pitted on most parts so needed sorting out. I was hoping to have a local bodyshop do this but they would not touch the prep and painting of the chrome as they could not guarantee the longevity of the finish. Plan B was for me to prep and paint, pretty painful job but needs must ! So out came the angle grinder, flapper/sanding wheel and wire brush wheel and off I went followed by filling the badly pitted areas and then sanding down to accept painting.

Picture
Whilst doing this, for a little light relief, I made up a steering column cowl to cover the Mk2 Escort stalks, this involved chopping up an Anglia and an Escort cowl and filling in the gap with fibreglass and the filling and sanding to look reasonable.

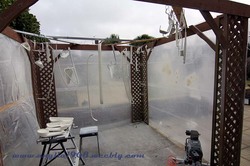
The next part of the process was aided by a kind donation of a compressor which I added a regulator, a cheap spray gun and some high build primer and Ford Ermine White cellulose paint. I then converted an old gazebo into a spray booth and set to work. Although not perfect the results are OK and will do until I have time to make perfect. So the bumpers (and brackets), grill, front and rear lights, side window frames, seat brackets, door and boot handles and all chrome trim is now Ermine White and will be fitted in a couple of weeks when it has fully gone off and I have taken out another mortgage to cover the cost of the various gaskets and clips that I need.
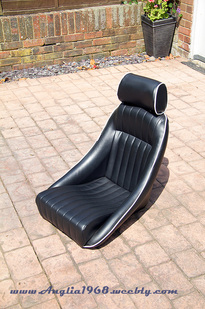
A couple of other small jobs completed have included: getting quotes for a carpet set which will need to be modified from a standard set because of the tunnel, bulkhead and rear suspension mods and I have also drawn up and got a quote for clamps to hold the trumpets on the throttle bodies, will need to order them soon.

So, with the engine run at least once, all of the wiring and plumbing in place and hopefully in a months time all of the trim and doors done I can start to see the end of the tunnel.

There she blows !

12/1/2016

 
Picture
Over the past month I have managed to get some time on the car and have been dealing with quite a few electrical head scratchers. The result is that I think I am now down to three main problems - indicator switch puts on the hazard warning lights, the dash powers off on ignition and I need to sort out the wiper motor wiring. There are another couple of small niggles but these are easily fixed.
The big headline, after much angst, is that the engine has finally been started and runs OK. I spent quite a bit of time working out why things were not working only to discover that the pins on the ECU loom plug were not connecting to the ECU pins. A fairly simple fix, removed the pins from the plug, gave then a squeeze with a pair of pliers, replaced them and all connections seem to be OK. Once done, the ECU saw the crank sensor, power was supplied to the coil pack and sparks were present, fuel pump primes, air and coolant temperature were registering and the throttle position sensor was calibrated OK. First turn of the key was encouraging with the engine trying to fire but no joy, swapped the wires around on the crank sensor and next turn of the key she fired up. It ran for a few seconds OK once the throttle bodies were opened up slightly (idle screw) but that was all as there is no coolant in the system.  Big result. Once all plumed in I need to check the cam position sensor output and VCT valve operation before starting to do some rudimentary tuning. A big thank you to various car online forum gurus that led me through all of the issues I have had.
Picture
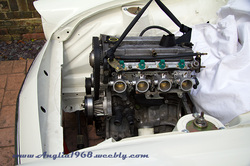
In order to get the coolant hoses in I think I will have to remove the throttle bodies which present an opportunity. I managed to pick up cheap a set of TJ 42mm parallel DCOE throttle bodies and an alloy matched manifold for the Zetec SE. These should give a bit more room on that side of the engine as they are angled upwards more and also give slightly better flow into the engine and better throttle response without messing about with either the pedal pivot point or throttle cable quadrant (on the bike TBs).

Whilst all this has been going on I have finished preparing the trim for painting so will get quote for that. So, there is light at the end of the tunnel and I can start to see the whole project coming together in the next four or five months, just in time for the Ace Cafe  gathering in July.

Electrickery !

22/11/2015

 
Picture
I managed to get a couple of days on the car over the last month. First job was to fit the hand brake cable. I used a Sierra one that had to be shortened but used the original handbrake cable mounting braked to fit it to. MK Engineering provided a new eyelet end which made the job pretty easy.  I also bought a pair of flexible hoses for the front brakes from Furore, made to measure and delivered in two days. These have been fitted completing the brake install, all ready to be topped up with fluid and bled, checking for leaks as we go.

Picture
The next big job was to start the wiring loom install. This is in multiple parts. The main section is the Premier Looms wiring loom that I had made to spec, added to this is the ETB and Omex flying looms for the dash and the ecu, in the engine bay is the Puma loom and finally a whole host of different switches, gauges etc. So, under the dash the various parts have been connected up with spade connectors so that any issues can be remedied easily. In the engine bay they are soldered to reduce the risk of corrosion/shorts etc. So as of today the vast majority of the loom is in and 75% is connected up, just a couple of issues with how the ecu is connected to the main loom for the fuel pump circuit and I need to look at borrowing a crimp tool for the main battery cables and earth straps. So hopefully a start up over Christmas is still on the cards.

Long time no see !

17/10/2015

 
Picture
Over the summer there has been a lot going on so I have had very little time on the car, all of which has been spent rubbing down the chrome trim and priming it ready for paining later int he year.
Fast forward to September and things have started to progress again. Three main jobs have got completed: fitting the exhaust, fitting the tanks and completing prep on the dash.
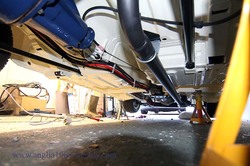
The exhaust had been modified, initialially fitted and then welded up remembering this is an Escort Pinto 2.25" manifold and system that runs straight down the driver side of the car. Since then I have sanded it back to bare metal, treated it and painted it in high temperature paint and then fitted it to the car and finished it off with a back box. It should sound rather fruity I think, may have some issues with noise levels if I do a track day in it in the future.

Picture
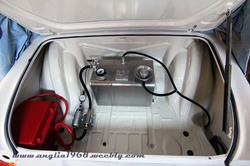
The fuel and combi (oil catch, radiator header and washer water) tanks arrived over the summers so these have now been fitted to the boot and engine bay respectively. The fuel tank and battery box are now bolted to the boot of the car and connected to the fuel pump and filter with kunifer and flexible hosing. The breather / filler overflow pipes are not quite right but not far off. The other end of the fuel pipes is also connected top the fuel rail on the engine.  Also in the engine bay the combitank has been installed. The original idea was to centrally mount it but the layout of the coolant pipes meant offsetting it to the passenger side, not as aesthetically pleasing but easier and more efficient to fit the pipework.

Picture
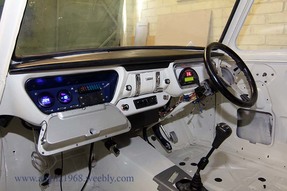
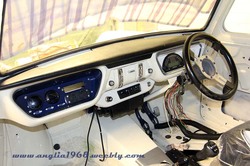
The third main job was to modify a glovebox lid to fit the digidash, fit the various electrical components in the glovebox and fit the heater thus almost completing the dash. The digidash was mounted into a spare glovebox lid using fibreglass, filled with p38 filler and sanded to a finish. This will be pained in body colour at a later date. the glovebox liner was a more challenging job fitting the ECU, wideband lambda gauge, vacuum gauge, three USB socked, two power sockets (12v and USB charger points) and the fuse box. eventually after a bit of head scratching I came up with a layout that seems to work OK. The mini heater and fibreglass radio panel were fitted after again a bit of thought but in the end look pretty neat, re-locating the ignition key to the ratio panel also work i think. So now the dash is almost ready to accept the wiring loom (from Premier Looms, Malaga, Spain) which arrived over the summer.
The other small job has been to sand down, fill and sand some more the various chrome trims for the outside of the car which will be body colour painted later. Not a quick job but will set the car off nicely with a more modern look.
So, over the next month or so I will be fitting the loom and then hopefully going for a start up before Christmas !!!!!!

More Odd Jobs

17/5/2015

 
Picture
A few minor jobs done over the weekend and one major one.

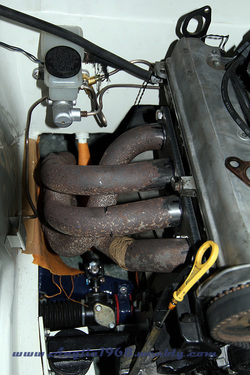
The major one first - got the exhaust manifold welded up and it fits nicely, thanks to Mick the Welder (family friend). Took a while to get it in the right place to clear the steering column but all looks OK in the end. I think I will need to put some heat shielding on the chassis member but that is not a big issue.

Minor jobs then - fitted the seat rails to the seats and tried them in the car (sat there for a while in the drivers seat grinning like a Cheshire cat !), fitted the seat belts to the floor eye bolts and roll bar, received some front window brackets from a fellow 105speed-er got these, the winder mechanism and other brackets cleaned and painted, sanded down the bumpers, Por15 metal prepped them and primed them and finally fixed one of the quarter lights that had a broke bracket.

Bank holiday weekend fun !

4/5/2015

 
Picture
Over this weekend I have mostly been ....... modifying an exhaust manifold (plus other jobs).

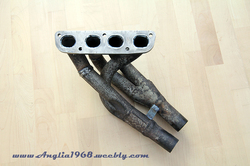
The Pinto Escort  Exhaust manifold (and system) that I bought cheap off ebay underwent some major surgery over the weekend. The pinto exhaust port pitch is approx 4", where as the Zetec SE is approx. 3.5mm therefore something needed to be done about the manifold to make it fir. The manifold came in two parts - cylinders 1-4 and 2-3, to get it to line up the first job was to work out how to pull in the 1-4 by 1.5" and the 2-3 by 0.5". Once this was done then the offset outwards from the engine to the wing and the angle that the pipes exited under the car needed modifying. After much cutting, bending, persuading and swearing I think I have something that will work. This will need welding up in a number of places but should make for a cost effective solution.

Picture
In addition I removed the rocker/cam cover, cleaned it up and gave it a coat of silver paint and lacquer to smarten things up a bit. next I started to strip the wiring loom of the parts I could use on the basis that if I use OEM parts where I can then it should look neater.  Using much of the engine side of the loom will also allow me to plug/unplug bits as required when fault finding, interesting the ford wiring starts of at the plugs being colour coded but on the car side of the engine loom it all turns to black cables, that should be fun ! Final two jobs for the weekend were to fit the throttle bodies so that I can start to collect bits for the coolant system and then look at mounting the seats on some mini adjustable runner that I have purchased.

Last but not least, I got an email from the guy making the tanks - a fuel tank, approx 7 gal for the boot and a combination tank for the rad header/washer water/oil catch for the front scuttle, showing progress on the fuel tank, looking good at this stage.

So, all in all a fairly productive weekend in-between jobs, outings and gardening, just what a Bank Holiday is for.


Even more bits and pieces

25/4/2015

 
Picture
Over the past few weeks going has been a little more leisurely due to family commitments but I have managed to get a few odd jobs done.

I made a start on the brake lines and have got all of the solid lines in. These are Kunifer (90% Copper, 10% Nickel)in 3/16" thickness with m10x1.0 fittings on all ends to match the calipers and brake master cylinder. I have cleaned up the copper with wet'n'dry and covered them in clear heatshrink wrapping. Hopefully this will keep them looking nice and also give them a bit of protection.

I have also started to lay in the power cables from the boot to the engine as I am re-locating the battery back to the boot.  And finally started making the fuel lines (supply and return for injection system). Both of these jobs are still to be completed.

Picture
I have also made a start on modifying the exhaust manifold and planning the routing/rear box. I have cut of the exhaust manifold mounting flanges and done a quick trial fit and it looks like it will fit with a bit more work.  In addition I have made up the mounting brackets for the radiator, fitted the the fan and got that mounts, all looks like to was made to be there.

Final set of jobs has been to  install the door locks, look at how the window mechanisms go together (realising the parts I had bought had some bits missing and some unusable), and last but not lease start to make up a pile of trim parts that will need sanding down, priming and eventually painting body colour (ermine white).

Picture
This last month has also provided quite a bit of mental effort in designing the exhaust manifold flange and pipe/cable clamps, specifying the wiring loom and designing the fuel tank and a combination tank (radiator header, washer bottle and oil catch tank). These are all now out with the respective manufacturers and should start to be delivered in 3-4 weeks time. I have also bought some mini seat sub frames and runners and a better indicator stalk (the one that came with the car had overspray on it and the horn was sticky). So an expensive month but hopefully this is the majority of the large parts purchased and so I should have a fairly trouble free run into the end (famous last words!).

Red letter Day !

7/3/2015

 
Picture
The Anglia has new boots and is back on the ground after 6 months on axle stands !!!

So, I managed to pick up some 185/50/14 Yoko A539s, got them fitted to my Minilites (Performance wheels, 6x14 ET26 on the front ET18 on the rear), tightened up the front suspension, fitted them and drop it off the axle stands.

Been a bit of a labour of love over the past few weeks getting the front end sorted, I guess a symptom of buying a car with an Escort Mk2 front end. Anyway after shortening the TCA and the steering rack, the wheels sit nicely in the unmodified arches (Whitspeed did a good job lining it all up to fit), just had to do a bit of massaging of the inner/out wing rear seam to get it to clear. I have about 1.5 degs of camber and 1.5 degs of castor (based on my clino tablet app) and can get the wheels with a little bit of toe in, so a good starter for ten. Steering arms also seem to be nice and flat.

Also the engine and gearbox are now fully bolted in on their new mounts, so hopefully progress will now start to warm up in the next few months.

I have also purchased a second hand Escort Mk2 4-2-1 Pinto manifold and 2.25" single box, driver's side exhaust system (silly cheap on ebay). I plan to have laser cur a manifold flange and then bend the headers to fit, the pitch needs reducing from 4" to approx 3" so may need a bit of heat, I can then get it welded up. Well that's the plan anyway, we will see how it pans out.

Enigne Mounts and a few jobs

22/2/2015

 
Picture
The period after Christmas is always pretty busy in our house as we have a number of family birthdays, this year was especially heck-tick as we had an 18th and two 80th's. But I did manage to get out in the garage this weekend for a few hours. The big event since the last post is that I have had the Engine Mounts welded up and painted so they have gone on nicely and the engine is hopefully now in its final resting place (almost). I have yet to drill the angle brackets which will be bolted to the chassis but this is the last job to do and then the engine and gearbox will be in. I also got the engine mounts removed from the cross member to give more room for the exhaust and also the oil filter, so that went back on and the front running gear is all now in place. As I have reduced the length of the TCA's I think once I get wheels on I may have to shorten the steering rack ends by about 20mm on each size as well.

Picture
Another couple of odd jobs that I have got finished over the weekend have been to re-mount the throttle bodies on the adapter plate and also shorten the hand brake lever.

When I originally mounted the throttle bodies I did it on the engine, bolting the adapter plate on first and then the throttle bodies. When I came to try and manually balance (using the wire feeler gauge method) I found that the throttle bodies were all at slightly different angles and by the time I got to the the forth one there was no adjustment left. So, I have now stripped it down, re-mounted the throttle bodies so they are all straight, re-bench balanced them and they are ready to bolt to the engine once the engine mounts are done.

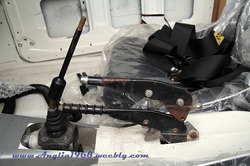
When I had mount the engine and got it in place relative to the cross member and the gearbox was on its mounts I found that  when in fourth gear the gearstick was fouled by the hand brake. So after a bit of head scratching I shortened the hand brake so it will all now work together.

Final item for this post, I managed to pick up a late model Mini heater (2 speed) on ebay, so that will be going in at some stage when IO get round to doing the plumbing.

More Odd Jobs

2/1/2015

 
Picture
Due to the cold weather I have had a fairly lazy Christmas but have managed to get out in the garage this last couple of days.

Mainly odd bits an pieces but have -

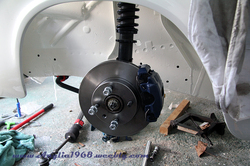
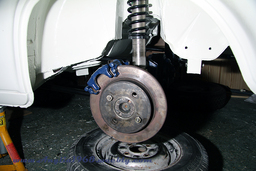
Got the front and rear brakes on and the track control arms shortened to give me some adjustment and also the top adjustable mounts re-drilled for a bit more camber. Engine and gearbox bolted together only to find that the clutch fork has no adjustment in it i.e. it is at the front of the travel and only just touching the clutch cover - easiest fix is to move the pivot point forward by about 20mm using a spacer. Finally started making up my dash mount for the ETB Digidash. Not authentic but I will give me a lot more info about engine/performance etc. I plan to fibreglass in the side and the rear, fill/primer and paint in body/dash colour (ermine white). I could go with the anchor blue of the roof/roll cage but will try the white first.  I also have all of the bits for my engine mounts made, marked up an ready for welding in the next couple of weeks and also the cross member ready to be modified further to give more space for the exhaust and oil filter. This can be done as I will be chassis mounting the engine.

Odd Jobs

30/11/2014

 
Picture
Just done a few odd jobs today. Fitted the rear brake caliper mounts using the bolts from Namrick, these seem to go OK and with the use of a couple of washers the calipers sit nice and central to the disc. Also gave the gearbox a coat of paint to freshen that up and prepped the gearbox mount for painting next week. Finally, fitted the new Alachi adjustable top mounts which included swapping over the bearing tops, re-drilling a couple of holes and then bolting them in. Nothing too strenuous but jobs that need doing. Will get the rest of the materials for the engine mounts ordered this week along with the remaining new brake parts, wheel studs, wheel nuts and some poly bushes for the steering rack and the anti roll bar.  So still on track to get all of the rolling stock complete by the end of Christmas.

Sump time.

24/11/2014

 
Picture
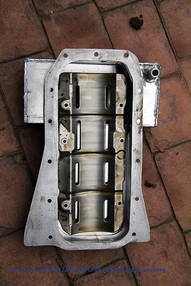
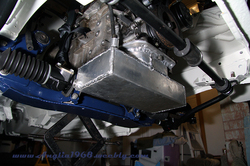
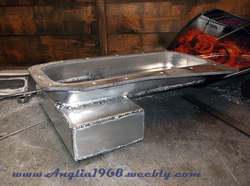
So, not a huge amount of progress but the sump has arrived. Thanks to www.crapengineering.weebly.com (aka Clairetoo on various forums) doing a pretty good job based on a fairly minimal sketch. The main aim was to retain the oil volume but move the bowl to the front to clear the cross member and steering column. In addition a drain plug and dip stick socket needed to be put in and also the pick up pipe modified to match the new sump.

The final outcome, as you can see, is a welded aluminium construction  with a 6mm top plate that has been made to match the OEM one. An additional modification to the windage plate was pretty straight forward (removing about 10mm from each side). As you can see it all fits very nicely and places the engine in the correct position with respect to the rear fuel/water connection and the bulkhead.

Picture
I have also got the engine mount parts laser cut, thanks to www.lasermaster.co.uk, and have carried out final measurements before ordering the rest of the material.  I have also received the adjustable top mounts from Alachi, again these will need some final adjustment (extra holes drilling) to get them to fit but these will give me a better camber at the front (looking for about 1 deg top in). Final job has been to give the gearbox a coat of paint before re-fitting the engine and gearbox, hopefully for the last time. This will be helped by some new bolts from www.namrick.co.uk. I hope to get out in the next couple of weeks to finish of the front end, fit the rear disc brackets and then measure up for tyres.

The rebuild starts !

26/10/2014

 
Picture
After a couple of weeks off following the marathon cleaning and painting session I managed to get out in the garage this weekend. So, now the car is fully clean and tidy (except for one little blemish on the drivers front wing) my attention turned to starting to re-install the mechanical parts of the car.

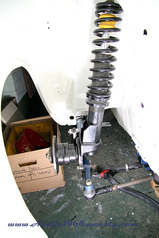
First up was the front axles, these hubs were put on, the bearings looked to be in pretty good order so just re-packed them with grease and then bolted them back together with new nuts and captive system.  All runs smoothly with no wobble, grinding  or tightness. I then put the uprights, anti roll bar, steering rack and TCAs back in the car to see what it all looked like and to start to get the alignment right (camber and toe).

Picture
All looked generally OK and except there is a bit too much camber for my liking. After a bit of a search it looks like the top mounts are Alachi 105e ones with added camber and caster.  With my TCAs wound in right the way there is about 4 degs of camber - I was hoping for something around 1.5 degs.  So after an exchange of emails I have ordered the Alachi eccentric fully adjustable top mounts, I can then re-use the bearings and circlips.

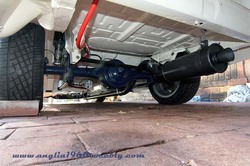
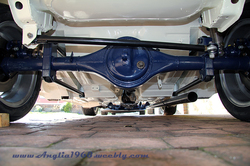
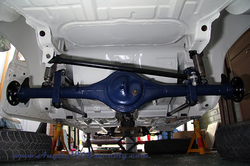
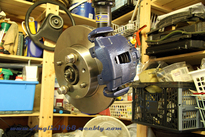
The rear end was then put back together, after much deliberation I have decided to stick with the 4.125:1 diff and see how it goes, I have tried a couple of times to get a 3.77:1 or 3.54:1 but with out luck or they were too expensive so I will wait for a while before deciding.  The rear end went back together well using some spacers made from the old drum brake backing plates. I also decided to butcher the Caprisport caliper mounts to fit behind the axle case end flange. After much grinding (metal and teeth) they now fit. Just need some longer studs and replacement brake parts (disc and pads) and all of the running gear will be sorted.

Picture
With the running gear well on the way to being restored I turned my attention to a few small jobs. Firstly, I had a mate's Dad pop round to have a look at welding up some engine mounts, modifying the cross member (taking off the mounts) and possibly welding up an exhaust (Spencer Ashley kit). Second on the list was to re-build the pedal box, do an initial fit and mount the brake master cylinder, all goes in well. Thirdly, was to look at demist, I bought a couple of cheap 150w cigarette lighter socket powered demisters which I have taken apart and now have running off one set of switches (the plan is to box them up and use one each side through the screen vents). Finally, I sent off drawings and the OEM sump to have a new one built. Got the pictures back today, and it is looking very good. I initially  was expecting a steel sump but  Crapengineering who are making it has decided to go with aluminium and I have no problems with that. I am looking forward to getting it and seeing how it all fits together.

So, the next few weeks will consist of buying the final parts for the running gear, installing them, finalising the designs for the mounts and getting those made up. So, by Christmas I am hoping to have all of the running gear in and mounted. I can then start on plumbing, brake runs and finally getting onto the electrics.

I have a shiny bottom

7/10/2014

 
Picture
Three weekends ago I finished off underside preparation by cleaning down the surface with a petrol soaked rag to remove the last of the underseal, wash with POR15 Aquaclean, wash with water, applied POR15 Metal Prep and carried out a final clean water wash down. This was then wiped down and left for a week to fully dry out. Then began the mammoth job of painting the rest of the underside, three days later and the whole of the underside had had two coats of KBS Rustseal, all seams sealed and a final coat of KBS Rustseal. So the whole process was -

  • Wirebrush of all lose paint and undeseal
  • Wash down with petrol soaked rag
  • Clean with POR15 Aquaclean
  • Wash down with clean water
  • Apply POR15 Metal Prep
  • Wash down with clean water
  • Wipe down with dry cloth
  • Leave for a week in garage to dry
  • Apply two coats of KBS Rustseal
  • Seal Seams with Tigerseal
  • Apply a final coat of KBS Rustseal

Picture
I disassembled the rear axle, removed the diff and drive shafts, cleaned these, the 5 link bars, front uprights, brake brackets and front hubs. Painted all of these with Hammerite so they are all ready to re-fit once the paint has been given time to go off fully. I also trial fitted the rear disc brackets. Unfortunately the Caprisport brackets that bolt onto the outer face of the axle casing do not fit  i.e. put the disc in the wrong place relative to the caliper (about 10-12mm out). After a measure up I concluded that brackets that fitted on the rear of the axle case flange were the once to get, so have ordered a set from Mk2mania.

I also ordered and received the adaptor plate for the throttle bodies from Lasermaster, looked a pretty good fit straight off but with a few slight tweaks and the bolt/stud holed drilled it looks like it will do just the job.  Only job left to do it to get a larger countersink to further recess the bolts for the adaptor to head connection.

Picture
The final job on chassis prep, after finishing the painting last week was to bolt together the engine, gearbox and bell housing and do a trial fit so that I could get measurements for the sump, engine mounts and gearbox mount. It all looks pretty good and looks like I will have some good space around the engine for the throttle bodies and the exhaust. Following these measurements I have developed CAD models of the sump/block mating face and mounting plates for the engine and have sent the sump ideas off for a quote.

So I am now in a position where I can start to bolt parts back onto the car rather than take them off. Rear axle will be first, then the front uprights which I suspect will take a while to get into a position where the camber/toe etc is correct and then I can start of ordering the engine mounts and possibly the exhaust and whilst these are making their way here I can look at door cards and assembling the doors/seals etc. and finalising the designs for the petrol tank , radiator header tank, catch tank and washer bottle and working out the coolant system .

More cleaning but the end is in sight.

14/9/2014

 
Picture
So, more cleaning of the underside of the car. I think I can see the end after three weekends of wire brushing. I have now completed the rear section and one side. So, just the passenger side section and it will be ready for final prep (petrol wipe down, marine clean degreaser , wash, metal prep etch, wash) and then be left for a week to dry out before painting. The front arches have had two coats but need a  third so will go around with seam sealer and then finish off with that third coat. 

Picture
I have also made a couple of purchases - an Omex 710 ecu to run the engine and an Innovate LC2 wide band lambda system plus gauge for mapping the ECU. The Omex is a top of the range ECU and able to run the VCT on the engine and also control the injectors fully sequentially if I needed that in the future. The engine and uprights are back from the machine shop so I can install the spigot bearing. I also go time to trial fit the Caprisport 260 brake kit on the uprights, looks very good and should be plenty to stop the lightweight Anglia.

Picture
The throttle bodies are coming along as well. I have had an adaptor plate CNC laser cut to my CAD drawing, sourced some full radius trumpets and so have had a trial fitting. The TB's and adaptor need a small amount of fettling but all should go together well.

So in general I can see the light at the end of the tunnel in terms of getting to a position where I can start to put stuff back on the car. Still a bit more cleaning to do, painting and also refurb of the rear axle. To sum up, progress has generally been good.

More painting and rear axle out.

23/8/2014

 
Picture
So today, after leaving the front under arches to dry off for a week, was the time to paint them. I am using KBS Rust Seal in Off White as I thought this would compliment (match) the topside of the car. Well the colour is a little lighter but not too bad and you will rarely see both side together.

If you use this paint be aware that once it is dry it does not come off, if you get it on skin you have to wait for that layer of skin to shed ! Once dry not even thinners will shift it.  Also note that the coverage on the tin is very optimistic, I gave both sides two coats with a brush and use about 2/3 of a Quart (1l) tin. This is going to be quite expensive to finish the whole of the underside as I think it will need another coat.

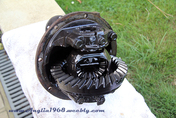
I also removed the back axle ready for clean/prep/paint and also to remove the 1/2 shafts and rear drums ready for the rear disc caliper brackets. I had hoped to do a swap (thought I had a 4.4:1) for a lower diff (3.89 or possible a 3.77) but once removed the diff is actually a 33/8 tooth crown wheel and pinion and so 4.125:1. The good news is that it is like new, no chipped teeth, all nice and tight and being a lower ratio than I thought I can live with it for now.

So, plans for the new few weeks - get engine/struts back, refit cross member and measure up for engine mounts (got an idea what i am going to do), clean and paint rear axle, fit rear brakes, clean and paint rear underside and send off for throttle body adaptor (got a good quote). Not much then !

Buying, Cleaning, Painting and Planning!

17/8/2014

 
Picture
Buying

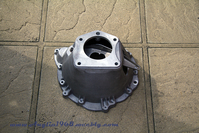
Managed to source the Zetec SE > Type 9 bellhousing and clutch fork and also got hold of a 215mm Pinto clutch,
I already has the release bearing so drive line should all bolt together now.

Second on the list, and quite difficult to find, was a low profile, rear water manifold that will help get the engine 100mm back in the engine bay. Thanks to Shawspeed for sourcing the bellhousing etc. and the water manifold.

I also managed to get hold of a Polo radiator for £26 delivered, bit of a bargain. Other items that I have had delivered included a set of door locks and internal rods, a set of front indicator shells,  a set of Peugeot 205GTI 14" Pepperpot alloys, the correct track rod ends, the Caprisport GTR260 and rear disc conversion brackets, a gear stick, a wiper motor and a matching Sabelt harness to the one I already have. In addition the previous owner called to let me know he had an additional box of bits and a missing front window, this had the original boot lock so I now have a matching set of locks, a few bits of trim and most of all an Escort Mk2 pedal box that the bulkhead had been modified for.

Picture
Cleaning and painting

I had planned to get the car out on the drive and up ion stands so that i could clean, prep and paint the underneath, but the week I had off work to do this had a variable weather forecast so I changed tack and worked on just the front end in the garage whilst cleaning, prepping and painting a load of other parts ready to go back on. Thankfully all I found was some surface rust and the underseal came of fairly easily.

The underneath of the wings up to the bulkhead/front jacking point were wire brushed, cleaned with petrol, washed with POR15 Marine Clean, washed in clean water, treated with POR15 Metal Prep and cleaned again in clean water.  The plan is to leave then to fully dry out over the next week and then paint with KBS Rust Seal paint (off white).

I also gave the brakes, pedal box, cross member and various brackets a coat(s) of paint once I had sourced some Hammerite Dark Blue paint (now discontinued but a great match to the Anchor Blue roof/roll bar). i also touched up the anti roll bar and steering rack with Hammerite black sating paint. Pictures of the painted parts are in the Images section.

Picture
Planning

So on the planning front there has been quite a bit of activity.

1) The engine has been dropped of to a local machine shop to have the spigot bearing cavity enlarged from 17mm to 22mm to take the standard Type 9 / pinto spigot bearing. the 1.7 Puma engine is the only one I can find in the Ford Catalog that is this size !

2)
The front uprights have been dropped off to a local machine shop to have the wheel flanges reduced (132mm IIRC) to fit the RS Turbo Escort discs, the original disc lugs removed and the caliper mounting holes clearanced out.

3) I think I have found a company to make the sump from sheet steel (easier than
modifying the ally sump) and have sent some initial drawings based on the second engine fit for quotation.

4) I have a couple of quotes back to water jet cut the inlet adaptor, still waiting for a couple more (I have cad this up in Autocad)

5) I have found a guy who can make a bespoke fuel tank, radiator header tank,
oil catch tank and washer bottle all at a very reasonable price.

6) I an 90% sure that I am going to go with Emerald for the ECU and have a source for them.


7) I have found a place that can make carpets to a paper/card template.


It Fits !!!!

1/6/2014

 
Picture
Made a few purchases this week including picking up the Corbeau Classic Clubman style seats (wide size for my fat a***) which come with head rests and white piping, a bit tarty but look pretty good in the car.

Also had delivered a few missing parts that I found on 105speed forums, these included a boot handle, a wiper motor, a pair of front indicator units and most importantly (and most difficult to find) a set of door locks and associated mechanisms. These all need a bit of TLC but as I am planning to colour code (paint all of the trim then that is fine.

Picture
So, having got the engine somewhere near clean last weekend I thought it would be easy to remove the sump, sort out the mangled sump plug and then give it a clean. But, no, the sump on this engine seems to be glued on so once you have removed all of the bolts it does not just drop off (like when they have a compressible gasket) it needs prizing off. I had no joy so may have to shell out for a tool to do this.

Picture
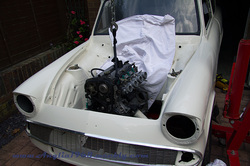
So, instead I thought I'd use my new toy, the 2 ton engine hoist, and see how the engine looks in the car. The outcome is plenty of space around the engine, exhaust side looks quite easy to route the exhaust around the cross member and the steering column. The sump bowl is slap bang in the middle of the cross member so a new front bowl will need to be fabricated. The oil filter looks like it will clash with the engine mounts so I may need a remote system adding to the parts list. Finally, the engine had a large casting on the rear to mount the coil pack and to route coolant to the radiator and the heater. This has been removed as it would mean moving the engine forward 100mm+, I have managed to source a low profile version (at a cost) but worth it to get it in the right place.

In addition to the engine I have chatted to Caprisport about brakes and looks like the XR4x4 bits I bought (an ebay bargain) are the right ones and will fit my uprights and axle with significantly less outlay that I was budgeting. They sell through Ebay and so I will be ordering caliper bracket for their GTR260 kit and rear axle kit and then sourcing some RS Turbo front brake discs (rears I can use from the XR4x4). Another bonus is that the rear hubs will not need machining but the downside is the fronts will.

So a fairly busy week in terms of planning and sourcing some hard to find parts but I can now see a plan coming together where the engine, brakes and gearbox will work in harmony.

Today I have been mostly ....

25/5/2014

 
....... cleaning my engine with a pot of petrol and a toothbrush !!!!!

Yes, that's right, toothbrush, the engine looks like it has had a rocker cover gasket leak (seems to be a recurring fault with this engine after the inlet manifold) and  there are areas (especially on the inlet side) that are covered in oil.  I tried Cilit Bang but didn't do much so resorted to petrol and a toothbrush. So, I got most of the engine clean but there is a layer of grime on the surface that will need wire brushing away. Got to leave some jobs for another day.

Also did a quick measure of the engine and I will have to do something about the rear of the engine. There is a casting that connects to the coolant system and acts as a mount for the coil pack which sticks out from the rear of the head. This will mean moving the engine forward 100+mm  which I do not want to do. I have seen slimline mods that move the radiator inlet to the inlet side but currently haven't found where to source them from.
<<Previous

    Father & Son Team

    I'm a mid-life crisis sufferer who just had to have another project.

    My son is impressionable and willing to learn the ways of "the petrol".

    Together we will learn, laugh, cry and probably fight in the creation of an automotive gem.


    Categories

    All
    Bodywork
    Brakes
    Electricals
    Engine/Gearbox
    Interior
    Misc
    Preparation
    Running Gear

    Archives

    September 2016
    April 2016
    January 2016
    November 2015
    October 2015
    May 2015
    April 2015
    March 2015
    February 2015
    January 2015
    November 2014
    October 2014
    September 2014
    August 2014
    June 2014
    May 2014
    April 2014
    March 2014

Powered by Create your own unique website with customizable templates.