1968 Ford Anglia Project
  • Homepage
  • Blog
  • Events
  • Spec
  • Images
    • General
    • Engine / Gearbox
    • Brakes
    • Running Gear
    • Bodywork
    • Interior
    • Electrical
    • Wheels
    • Drawings
  • Videos
  • Weights

Long time no see !

17/10/2015

 
Picture
Over the summer there has been a lot going on so I have had very little time on the car, all of which has been spent rubbing down the chrome trim and priming it ready for paining later int he year.
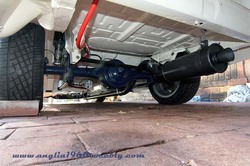
Fast forward to September and things have started to progress again. Three main jobs have got completed: fitting the exhaust, fitting the tanks and completing prep on the dash.
The exhaust had been modified, initialially fitted and then welded up remembering this is an Escort Pinto 2.25" manifold and system that runs straight down the driver side of the car. Since then I have sanded it back to bare metal, treated it and painted it in high temperature paint and then fitted it to the car and finished it off with a back box. It should sound rather fruity I think, may have some issues with noise levels if I do a track day in it in the future.
Picture
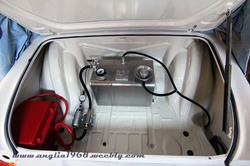
The fuel and combi (oil catch, radiator header and washer water) tanks arrived over the summers so these have now been fitted to the boot and engine bay respectively. The fuel tank and battery box are now bolted to the boot of the car and connected to the fuel pump and filter with kunifer and flexible hosing. The breather / filler overflow pipes are not quite right but not far off. The other end of the fuel pipes is also connected top the fuel rail on the engine.  Also in the engine bay the combitank has been installed. The original idea was to centrally mount it but the layout of the coolant pipes meant offsetting it to the passenger side, not as aesthetically pleasing but easier and more efficient to fit the pipework.

Picture
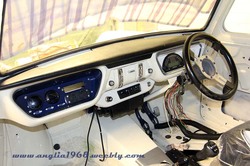
The third main job was to modify a glovebox lid to fit the digidash, fit the various electrical components in the glovebox and fit the heater thus almost completing the dash. The digidash was mounted into a spare glovebox lid using fibreglass, filled with p38 filler and sanded to a finish. This will be pained in body colour at a later date. the glovebox liner was a more challenging job fitting the ECU, wideband lambda gauge, vacuum gauge, three USB socked, two power sockets (12v and USB charger points) and the fuse box. eventually after a bit of head scratching I came up with a layout that seems to work OK. The mini heater and fibreglass radio panel were fitted after again a bit of thought but in the end look pretty neat, re-locating the ignition key to the ratio panel also work i think. So now the dash is almost ready to accept the wiring loom (from Premier Looms, Malaga, Spain) which arrived over the summer.
The other small job has been to sand down, fill and sand some more the various chrome trims for the outside of the car which will be body colour painted later. Not a quick job but will set the car off nicely with a more modern look.
So, over the next month or so I will be fitting the loom and then hopefully going for a start up before Christmas !!!!!!
Red letter Day !

7/3/2015

 
Picture
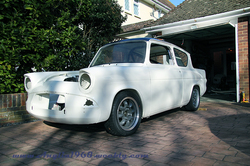
The Anglia has new boots and is back on the ground after 6 months on axle stands !!!

So, I managed to pick up some 185/50/14 Yoko A539s, got them fitted to my Minilites (Performance wheels, 6x14 ET26 on the front ET18 on the rear), tightened up the front suspension, fitted them and drop it off the axle stands.

Been a bit of a labour of love over the past few weeks getting the front end sorted, I guess a symptom of buying a car with an Escort Mk2 front end. Anyway after shortening the TCA and the steering rack, the wheels sit nicely in the unmodified arches (Whitspeed did a good job lining it all up to fit), just had to do a bit of massaging of the inner/out wing rear seam to get it to clear. I have about 1.5 degs of camber and 1.5 degs of castor (based on my clino tablet app) and can get the wheels with a little bit of toe in, so a good starter for ten. Steering arms also seem to be nice and flat.

Also the engine and gearbox are now fully bolted in on their new mounts, so hopefully progress will now start to warm up in the next few months.

I have also purchased a second hand Escort Mk2 4-2-1 Pinto manifold and 2.25" single box, driver's side exhaust system (silly cheap on ebay). I plan to have laser cur a manifold flange and then bend the headers to fit, the pitch needs reducing from 4" to approx 3" so may need a bit of heat, I can then get it welded up. Well that's the plan anyway, we will see how it pans out.

Odd Jobs

30/11/2014

 
Picture
Just done a few odd jobs today. Fitted the rear brake caliper mounts using the bolts from Namrick, these seem to go OK and with the use of a couple of washers the calipers sit nice and central to the disc. Also gave the gearbox a coat of paint to freshen that up and prepped the gearbox mount for painting next week. Finally, fitted the new Alachi adjustable top mounts which included swapping over the bearing tops, re-drilling a couple of holes and then bolting them in. Nothing too strenuous but jobs that need doing. Will get the rest of the materials for the engine mounts ordered this week along with the remaining new brake parts, wheel studs, wheel nuts and some poly bushes for the steering rack and the anti roll bar.  So still on track to get all of the rolling stock complete by the end of Christmas.

The rebuild starts !

26/10/2014

 
Picture
After a couple of weeks off following the marathon cleaning and painting session I managed to get out in the garage this weekend. So, now the car is fully clean and tidy (except for one little blemish on the drivers front wing) my attention turned to starting to re-install the mechanical parts of the car.

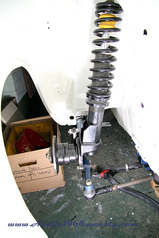
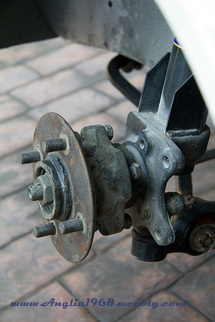
First up was the front axles, these hubs were put on, the bearings looked to be in pretty good order so just re-packed them with grease and then bolted them back together with new nuts and captive system.  All runs smoothly with no wobble, grinding  or tightness. I then put the uprights, anti roll bar, steering rack and TCAs back in the car to see what it all looked like and to start to get the alignment right (camber and toe).

Picture
All looked generally OK and except there is a bit too much camber for my liking. After a bit of a search it looks like the top mounts are Alachi 105e ones with added camber and caster.  With my TCAs wound in right the way there is about 4 degs of camber - I was hoping for something around 1.5 degs.  So after an exchange of emails I have ordered the Alachi eccentric fully adjustable top mounts, I can then re-use the bearings and circlips.

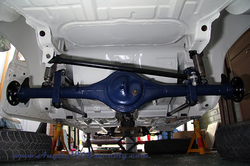
The rear end was then put back together, after much deliberation I have decided to stick with the 4.125:1 diff and see how it goes, I have tried a couple of times to get a 3.77:1 or 3.54:1 but with out luck or they were too expensive so I will wait for a while before deciding.  The rear end went back together well using some spacers made from the old drum brake backing plates. I also decided to butcher the Caprisport caliper mounts to fit behind the axle case end flange. After much grinding (metal and teeth) they now fit. Just need some longer studs and replacement brake parts (disc and pads) and all of the running gear will be sorted.

Picture
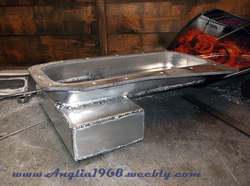
With the running gear well on the way to being restored I turned my attention to a few small jobs. Firstly, I had a mate's Dad pop round to have a look at welding up some engine mounts, modifying the cross member (taking off the mounts) and possibly welding up an exhaust (Spencer Ashley kit). Second on the list was to re-build the pedal box, do an initial fit and mount the brake master cylinder, all goes in well. Thirdly, was to look at demist, I bought a couple of cheap 150w cigarette lighter socket powered demisters which I have taken apart and now have running off one set of switches (the plan is to box them up and use one each side through the screen vents). Finally, I sent off drawings and the OEM sump to have a new one built. Got the pictures back today, and it is looking very good. I initially  was expecting a steel sump but  Crapengineering who are making it has decided to go with aluminium and I have no problems with that. I am looking forward to getting it and seeing how it all fits together.

So, the next few weeks will consist of buying the final parts for the running gear, installing them, finalising the designs for the mounts and getting those made up. So, by Christmas I am hoping to have all of the running gear in and mounted. I can then start on plumbing, brake runs and finally getting onto the electrics.

I have a shiny bottom

7/10/2014

 
Picture
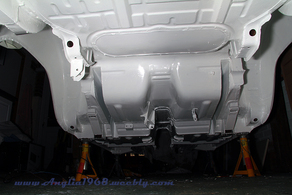
Three weekends ago I finished off underside preparation by cleaning down the surface with a petrol soaked rag to remove the last of the underseal, wash with POR15 Aquaclean, wash with water, applied POR15 Metal Prep and carried out a final clean water wash down. This was then wiped down and left for a week to fully dry out. Then began the mammoth job of painting the rest of the underside, three days later and the whole of the underside had had two coats of KBS Rustseal, all seams sealed and a final coat of KBS Rustseal. So the whole process was -

  • Wirebrush of all lose paint and undeseal
  • Wash down with petrol soaked rag
  • Clean with POR15 Aquaclean
  • Wash down with clean water
  • Apply POR15 Metal Prep
  • Wash down with clean water
  • Wipe down with dry cloth
  • Leave for a week in garage to dry
  • Apply two coats of KBS Rustseal
  • Seal Seams with Tigerseal
  • Apply a final coat of KBS Rustseal

Picture
I disassembled the rear axle, removed the diff and drive shafts, cleaned these, the 5 link bars, front uprights, brake brackets and front hubs. Painted all of these with Hammerite so they are all ready to re-fit once the paint has been given time to go off fully. I also trial fitted the rear disc brackets. Unfortunately the Caprisport brackets that bolt onto the outer face of the axle casing do not fit  i.e. put the disc in the wrong place relative to the caliper (about 10-12mm out). After a measure up I concluded that brackets that fitted on the rear of the axle case flange were the once to get, so have ordered a set from Mk2mania.

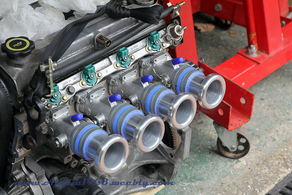
I also ordered and received the adaptor plate for the throttle bodies from Lasermaster, looked a pretty good fit straight off but with a few slight tweaks and the bolt/stud holed drilled it looks like it will do just the job.  Only job left to do it to get a larger countersink to further recess the bolts for the adaptor to head connection.

Picture
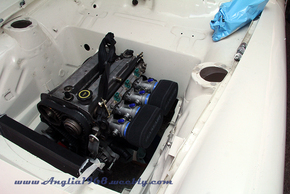
The final job on chassis prep, after finishing the painting last week was to bolt together the engine, gearbox and bell housing and do a trial fit so that I could get measurements for the sump, engine mounts and gearbox mount. It all looks pretty good and looks like I will have some good space around the engine for the throttle bodies and the exhaust. Following these measurements I have developed CAD models of the sump/block mating face and mounting plates for the engine and have sent the sump ideas off for a quote.

So I am now in a position where I can start to bolt parts back onto the car rather than take them off. Rear axle will be first, then the front uprights which I suspect will take a while to get into a position where the camber/toe etc is correct and then I can start of ordering the engine mounts and possibly the exhaust and whilst these are making their way here I can look at door cards and assembling the doors/seals etc. and finalising the designs for the petrol tank , radiator header tank, catch tank and washer bottle and working out the coolant system .

More painting and rear axle out.

23/8/2014

 
Picture
So today, after leaving the front under arches to dry off for a week, was the time to paint them. I am using KBS Rust Seal in Off White as I thought this would compliment (match) the topside of the car. Well the colour is a little lighter but not too bad and you will rarely see both side together.

If you use this paint be aware that once it is dry it does not come off, if you get it on skin you have to wait for that layer of skin to shed ! Once dry not even thinners will shift it.  Also note that the coverage on the tin is very optimistic, I gave both sides two coats with a brush and use about 2/3 of a Quart (1l) tin. This is going to be quite expensive to finish the whole of the underside as I think it will need another coat.

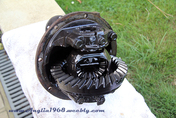
I also removed the back axle ready for clean/prep/paint and also to remove the 1/2 shafts and rear drums ready for the rear disc caliper brackets. I had hoped to do a swap (thought I had a 4.4:1) for a lower diff (3.89 or possible a 3.77) but once removed the diff is actually a 33/8 tooth crown wheel and pinion and so 4.125:1. The good news is that it is like new, no chipped teeth, all nice and tight and being a lower ratio than I thought I can live with it for now.

So, plans for the new few weeks - get engine/struts back, refit cross member and measure up for engine mounts (got an idea what i am going to do), clean and paint rear axle, fit rear brakes, clean and paint rear underside and send off for throttle body adaptor (got a good quote). Not much then !

Front Uprights

30/3/2014

 
Picture
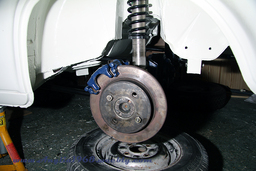
I put up a couple of photos of the front uprights on OldSkoolFords and it looks like they are Escort/Carpi ones (many thanks to Wilko), which is good as this opens up a few more brake choices. So, current plans for the brakes are -

Front - Wilwood 247mm x 20mm discs (Capri 2.8i origin I think) with 4 pot Forged Dynalite calipers
Rear - Mk3/4 Ford Fiesta solid discs and Ford Granada single pot calipers
Pedal Box - brake bias but will have to decide on mechanical or hydraulic clutch, would like to keep the mechanical but it depends whether the Type 9 will fit in the tunnel with this set up (standard)

Kits are available for these and this is a fairly well known fitting so should be easy to source/fit. This will be finalised once the body and suspension/axles are prepped and complete.

These will all fit under 13" rims, next job is to confirm they fit under a 5.5" wide rim and what ET I need to fit under the standard arches.

    Father & Son Team

    I'm a mid-life crisis sufferer who just had to have another project.

    My son is impressionable and willing to learn the ways of "the petrol".

    Together we will learn, laugh, cry and probably fight in the creation of an automotive gem.


    Categories

    All
    Bodywork
    Brakes
    Electricals
    Engine/Gearbox
    Interior
    Misc
    Preparation
    Running Gear

    Archives

    September 2016
    April 2016
    January 2016
    November 2015
    October 2015
    May 2015
    April 2015
    March 2015
    February 2015
    January 2015
    November 2014
    October 2014
    September 2014
    August 2014
    June 2014
    May 2014
    April 2014
    March 2014

Powered by Create your own unique website with customizable templates.